Japanese Cooking 101, Lesson 5 - Fish, Part 1: Salmon Teriyaki
Welcome back to Japanese Cooking 101: The Fundamentals of Washoku. We are entering the most involved lesson in the whole series: how to deal with fish. As I explained previously, learning how to deal with fish is pretty fundamental to conquering traditional Japanese cooking. So, Lesson 5 is divided up into several parts.
Before we dive into the deep end, let's start with something easy: cooking a piece of salmon. Salmon is one of the most easily obtainable fresh fish, since it's so popular, still available in abundance since part of the supply comed from fish farms (although the farmed variety has some catching up to do in terms of taste to the wild kind), and overall a pretty easy fish to deal with. It usually comes to us in cut form so we don't have to deal with de-boning or fileting it and things.
Incidentally, I prefer to buy all my fish, salmon included, with the skin on. The skin of a salmon is delcious anyway, but the main reason for buying a fish with the skin on is that it holds the flesh of the fish together better. And with very low-fat fish the skin helps to prevents the flesh from drying out too much.
While I've given you several formulas for teriyaki over the years on both JustHungry and JustBento, this is the one I use the most now because it's easy to memorise. The teriyaki sauce formula is a 2:2:2:1 ratio of soy sauce, sake, mirin and sugar. You can halve or omit the sugar if you like it less sweet. The sake and mirin are what give this that delicious 'teriyaki' flavor, so do try to use them if possible.
Salmon Teriyaki
Prep time: 5 min :: Cook time: 10 min :: Total time: 60 min
Yield: 2 servings
Serving size: 100-150g (approx. 3 to 5 oz)
Ingredients:
- 200-300g (approx. 7 to 10.5 oz) fresh salmon, skin on
- salt
- flour, cornstarch or potato starch, optional
- 2 to 3 tablespoons soy sauce
- 2 to 3 tablespoons sake
- 2 to 3 tablespoons mirin
- 1 to 1.5 tablespoons sugar
- oil , for frying
Directions:
- So, let's say you have a nice, glistening, fresh piece of salmon. Salmon is a rather fatty fish, and it benefits from an initial salt treatment. The salt helps to draw out excess moisture from the fish, firms up the meat and also eliminates any hint of 'fishiness', leaving it tasting delicious. You only need to sprinkle a little bit on, like so:
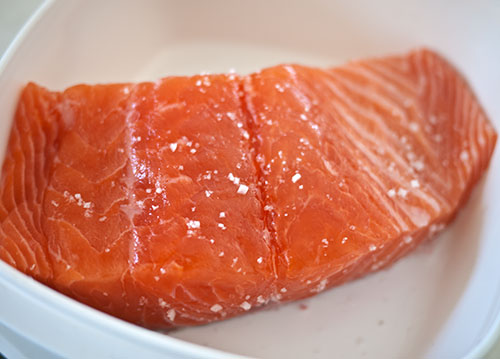
- Leave the fish like that for at least 30 minutes if you can, or in the refrigerator for up to a day.
- Cut your slab of salmon into individual serving size pieces about 2-3 cm (1 to 1 1/2 cm) wide. Optionally coat each piece in flour, cornstarch or potato flour - this will make the sauce a bit thicker.
- The rest goes very quickly. Teriyaki is cooked about 80% of the way before you add the sauce ingredients. Heat up a frying pan with a little cooking oil, and put in the salmon in one layer.
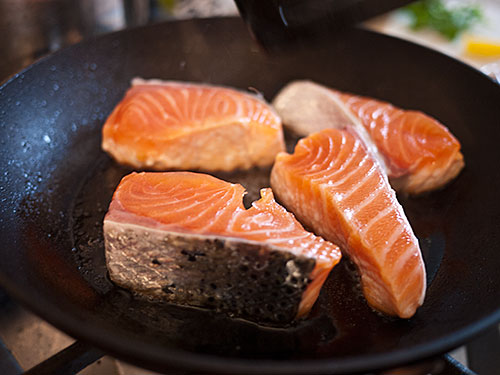
- Cook each side over medium-high heat until browned.
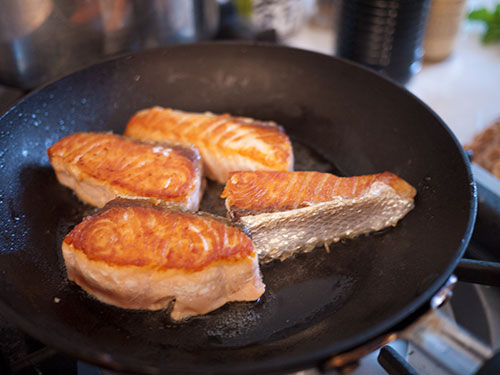
- Make sure to brown and crisp up the skin side well.
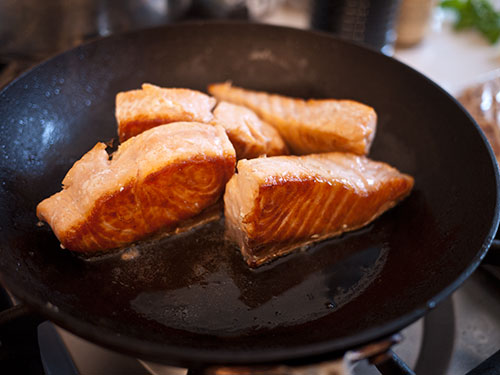
- While you are cooking the salmon, combine the soy sauce, sake, mirin and sugar in a bowl. When the salmon is just about cooked, add all the sauce ingredients in one go into the pan. Careful - it will sizzle and spit a bit.
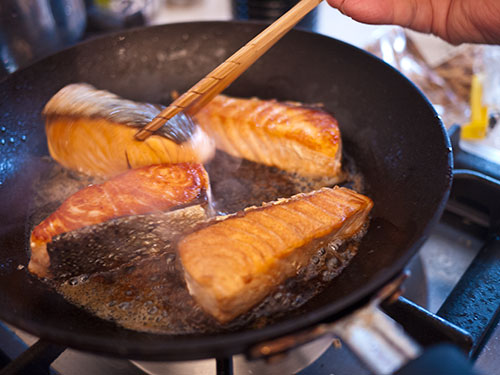
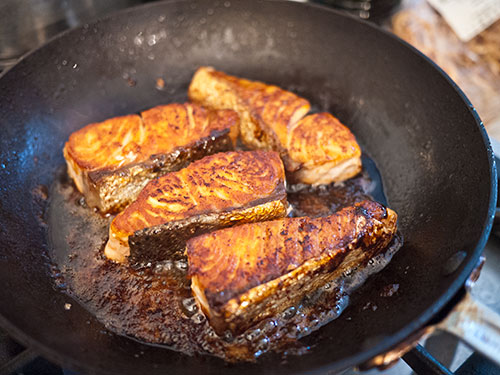
- Rapidly turn the fish pieces so that they are coated in the sauce. In the meantime the sauce will thicken up a bit as the moisture evaporates. When the salmon is a deep golden brown, it's done.
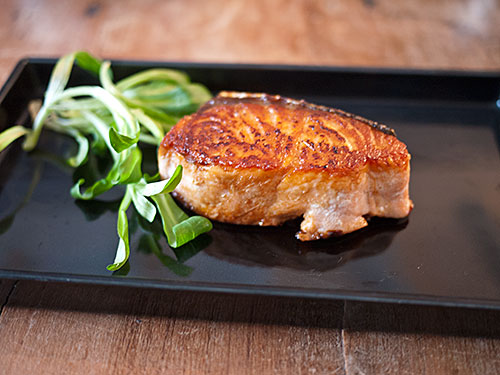
- The basic rule for how to present a piece of fish is, to put the skin side away from the diner. There should always be a bit of garnish too, to provide a contrast in color as well as a contrast in taste. This can be anything that's nice and green - here I've just used a bit of lamb's lettuce (mache), but traditionally you might use a couple of shiso leaves, or panfried shishito peppers, or even a couple of green beans or snap peas.
(this part is for search engines)
By Makiko Itoh
Published: April 16, 2013
Type: fish, japanese, washoku
Variations
You can use this exact same formula for any kind of oily, firm fish such as swordfish or mahi-mahi. It is perfect for buri or amberjack/yellowtail. It doesn't work as well with white fish, but you can give it a try providing the fish is firm.
If you are making a larger quantity, use a ratio of 2 tablespoons each of soy sauce, sake, and mirin plus 1 tablespoon of sugar per 100-120g (3 to 4 oz) of fish.
You can also use a similar formula for chicken, including the pre-salting. Use the thigh meat, skin on or off; if skin on, pierce the skin a few times with a fork before cooking, and start cooking with the skin side down. Turn over when the skin is nice and crisp.
Note that I do not marinate the fish in the sauce beforehand. This is because I think the fish tastes better if it has been pre-salted instead, which enhances the umami that is already in the fish. Not pre-marinading also means you can get a nice crispy skin.
So, that was easy wasn't it? Next time as we continue the Fish Lesson, we'll dive into something a bit more challenging.
Filed under: japanese fish washoku japanesecooking101